
A single-zone ductless mini-split is the fastest, most affordable way to heat and cool one room. Install takes 4–8 hours, costs $3,500–$5,500, and pays for itself in 2–4 years compared to window ACs and space heaters.
Home Electrification Experts — Full-Service Design to Install, 9 States
Quick Answer: Ductless Mini-Split for One Room
A single-zone ductless mini-split costs $3,500–$5,500 installed and is the best way to heat and cool one room. The Mitsubishi FX 9Kis our top pick for cold climates (–22°F rated). Installation takes 4–8 hours with no ductwork needed. State rebates of $450–$3,000 are available in 2026, with enhanced tiers for income-eligible households. The federal Section 25C tax credit expired December 31, 2025 — there is no federal tax credit for heat pumps in 2026.
Installed Cost
$3,500–$5,500
Install Time
4–8 Hours
Operating Cost
$300–$500/yr
Lifespan
15–20 Years
Typical Cost
$3,500–$5,500
fully installed
Install Time
4–8 Hours
single day
Energy Savings
30–50%
vs baseboard/window AC
Noise Level
19–28 dB
whisper quiet
When a Single Ductless Head Makes Sense
A ductless mini-split with one indoor head and one outdoor compressor is the simplest, fastest, and most cost-effective way to add heating and cooling to a single room. It requires no ductwork, installs in a single day, and provides both heating and air conditioning through one unit. Here are the most common scenarios where a single-zone ductless system is the right answer.
Bonus rooms and additions
Rooms built over garages or added after original construction rarely have duct connections. A mini-split is the only practical HVAC option.
Sunrooms and three-season porches
Converting a three-season porch to year-round use. A 9K–12K BTU unit handles most sunrooms. Pair with insulated glass for best results.
Garage workshops
Insulated garages used as workshops, home gyms, or art studios. A 12K–18K BTU unit provides year-round comfort with minimal electricity cost.
Home offices
Remote work demands comfortable temperature control in one room. A mini-split lets you heat or cool your office without conditioning the entire house.
Server and equipment rooms
Rooms with computers, servers, or AV equipment that generate constant heat. A mini-split provides targeted cooling without overcooling adjacent spaces.
Primary bedroom comfort
Many homes have one room that is always too hot in summer or too cold in winter. A mini-split solves the hot/cold spot problem permanently.
Attic conversions
Finished attics are notoriously hard to condition. A mini-split provides powerful cooling in summer and supplemental heat in winter.
In-law suites and ADUs
Accessory dwelling units need independent climate control. A single-zone mini-split gives the occupant full control without affecting the main house system.
Top 5 Single-Zone Mini-Splits for One Room (2026)
We have installed thousands of single-zone systems across New England and the mid-Atlantic. These are the five units we recommend most often for single-room applications in 2026, based on real-world performance, reliability data, warranty support, and value. All prices are fully installed by a licensed contractor.
Mitsubishi FX 9K
~$4,200 installed
Heating Down To
-22°F
Noise (Indoor)
21 dB
SEER2 / HSPF2
23.0 / 12.5
Refrigerant
R-454B
Best for: Cold-climate single rooms where reliability matters most. The gold standard in New England.
Fujitsu 9RLS3YH
~$3,800 installed
Heating Down To
-15°F
Noise (Indoor)
19 dB
SEER2 / HSPF2
22.0 / 12.0
Refrigerant
R-410A
Best for: Bedrooms where silence is critical. 19 dB is quieter than a whisper. Great for light sleepers.
Gree Sapphire 9K
~$3,200 installed
Heating Down To
-22°F
Noise (Indoor)
24 dB
SEER2 / HSPF2
22.0 / 11.5
Refrigerant
R-32
Best for: Budget-conscious buyers who still want cold-climate performance. Excellent warranty (7-year parts).
Samsung Wind-Free 9K
~$3,600 installed
Heating Down To
-13°F
Noise (Indoor)
22 dB
SEER2 / HSPF2
21.0 / 11.0
Refrigerant
R-410A
Best for: People who hate feeling a draft. Wind-Free mode disperses air through 23,000 micro-holes.
MrCool DIY 12K
~$1,800 DIY
Heating Down To
-5°F
Noise (Indoor)
25 dB
SEER2 / HSPF2
19.0 / 9.5
Refrigerant
R-410A
Best for: Handy homeowners in moderate climates. Pre-charged lines. No state rebate eligibility and limited warranty.
A note on MrCool DIY: while the price is attractive, DIY-installed units do not qualify for state rebates (which require licensed contractor installation) and the cold-climate rating is only –5°F — inadequate for most of New England. If you live in a mild climate zone and are handy with electrical work, it can make sense. For everyone else, the professionally installed options pay for themselves through rebate eligibility and superior cold-weather performance.
BTU Sizing Quick Guide: Choosing the Right Size
Sizing a single-zone mini-split is more straightforward than sizing a whole-home system, but getting it right still matters. An undersized unit will struggle in extreme temperatures. An oversized unit will short-cycle — turning on and off rapidly — which wastes energy, creates temperature swings, and reduces the unit's lifespan.
| Room Size | BTU Needed | Model Size | Recommended Unit | Installed Cost |
|---|---|---|---|---|
| 150–250 sq ft | 9,000 BTU | 9K | Mitsubishi FX 9K or Fujitsu 9RLS3YH | $3,500–$4,500 |
| 250–400 sq ft | 12,000 BTU | 12K | Mitsubishi FX 12K or Gree Sapphire 12K | $3,800–$5,000 |
| 400–600 sq ft | 18,000 BTU | 18K | Mitsubishi GL 18K or Fujitsu 18RLS3YH | $4,200–$5,500 |
| 600–900 sq ft | 24,000 BTU | 24K | 24K single-zone or consider dual-zone | $4,800–$6,000 |
When to Size Up (or Down)
The table above assumes a well-insulated room with standard 8-foot ceilings. Several factors require you to adjust the BTU calculation:
High ceilings (over 9 ft)
Size UPAdd 20% BTU capacity for every additional foot of ceiling height. A 12-foot ceiling in a 300 sq ft room needs a 12K unit, not a 9K.
Large window area (30%+ of wall)
Size UPWindows are the biggest source of heat loss in winter and heat gain in summer. Single-pane or older double-pane windows can require a full size jump.
Poor insulation or no insulation
Size UPUninsulated walls lose 3-4x more heat than R-13 walls. Garages, attics, and older additions often have inadequate insulation. Consider insulating first.
South/west sun exposure
Size UPHeavy afternoon sun can add 2,000-4,000 BTU of heat gain in summer. Critical for sunrooms and rooms with large west-facing windows.
Room above unheated space
Size UPBonus rooms over garages, rooms over crawl spaces, and cantilevered bays lose heat through the floor. Insulate the floor and size up one level.
Well-insulated, north-facing
Size DOWNA well-insulated room with minimal window area and north-facing exposure may need fewer BTUs than the chart suggests. Avoid oversizing.
When in doubt, ask your installer to perform a Manual J load calculation for the room. This 15-minute assessment accounts for insulation, windows, orientation, climate zone, and internal heat sources. It is the only way to guarantee correct sizing. NuWatt includes a load calculation with every free site assessment.
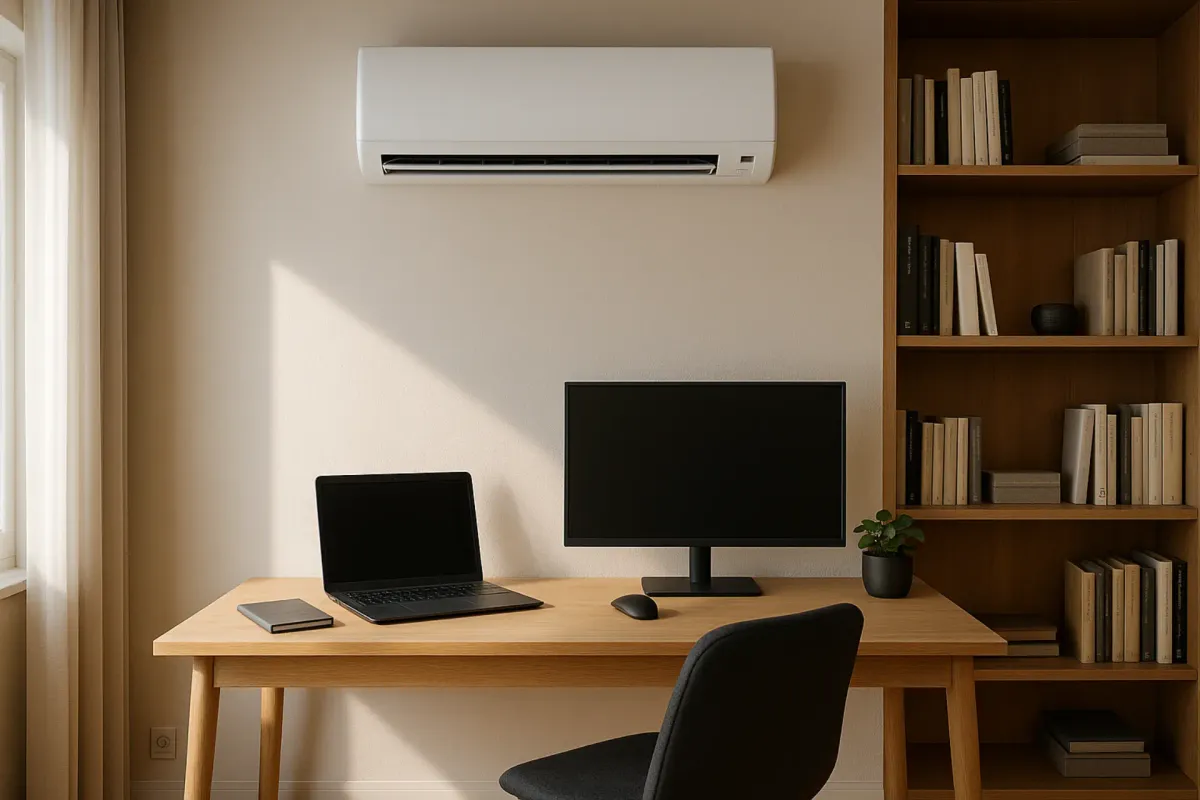
The 5 Indoor Unit Options
Most people think of the wall-mounted head when they hear "mini-split," but there are actually five distinct types of indoor units. Each has specific advantages depending on your room layout, aesthetic preferences, and ceiling type.
$3,500–$5,000
Wall Mount
Pros
Lowest cost. Easiest install. Best airflow distribution. Most efficient.
Cons
Visible on wall. Cannot place furniture in front of it. Some find aesthetics objectionable.
Best for: Most rooms — the default choice for good reason.
$4,500–$6,500
Ceiling Cassette
Pros
Nearly invisible (flush with ceiling). 360° airflow. Premium appearance.
Cons
Requires ceiling access/attic above. Higher install cost. Harder to maintain filters.
Best for: Drop ceilings, rooms where aesthetics are paramount, commercial-look spaces.
$4,000–$5,500
Floor Console
Pros
Low profile (sits on floor against wall). Great for rooms without wall space. Easy filter access.
Cons
Takes floor space. Must keep area clear. Slightly less efficient air distribution.
Best for: Rooms with large windows/glass walls, knee walls (Cape Cod attics), sunrooms.
$4,500–$6,500
Slim Duct
Pros
Completely hidden — unit in ceiling/wall cavity. Only visible element is a small grille.
Cons
Requires cavity space for unit. Short duct runs needed. Slightly lower efficiency.
Best for: Homeowners who want zero visible equipment. Remodels where walls are open.
$4,200–$6,000
Ceiling Suspended
Pros
Hangs from ceiling, no attic needed. Good airflow. Works in rooms with no wall or floor space.
Cons
Visually prominent. Best in high-ceiling rooms. Less common in residential.
Best for: High-ceiling rooms (garages, lofts), commercial spaces, rooms with all-glass walls.
$4,000–$5,800
Multi-Position Air Handler
Pros
Can be installed horizontally in attic, vertically in closet, or under floor. Hidden from view.
Cons
Requires short duct run. Needs service access. Larger than slim duct unit.
Best for: Closet installations, attic installs, when ducting to one or two registers.
For the vast majority of single-room installations, the wall mount is the right choice. It is the least expensive, the easiest to install, the most efficient, and the easiest to maintain. Choose an alternative only if you have a specific reason — aesthetics, room geometry, or lack of suitable wall space.
Installation: What to Expect
A single-zone ductless installation is one of the least disruptive home improvement projects you can undertake. Here is what a typical installation day looks like from start to finish:
Site prep and protection
30 minInstaller lays drop cloths, identifies mounting locations for indoor and outdoor units, confirms electrical circuit availability.
Outdoor unit installation
1 hourPlace condenser on ground-level pad or wall bracket. Level and secure. Route electrical whip from disconnect box.
Indoor unit mounting and line routing
1–2 hoursMount the backing plate on the wall. Drill a 3-inch hole through the exterior wall. Route refrigerant lines, condensate drain, and communication cable through the hole.
Refrigerant line connection
1 hourConnect copper refrigerant lines between indoor and outdoor units. Flare fittings, torque to spec. This is the most skill-dependent step — proper flaring prevents leaks.
Electrical connections
45 minWire the outdoor disconnect, run cable from panel to disconnect, and connect communication wiring between indoor and outdoor units.
Vacuum, pressure test, and charge
45 minPull vacuum on refrigerant lines (minimum 30 minutes at 500 microns). Verify no leaks via nitrogen pressure test. Release factory refrigerant charge or add refrigerant if line length exceeds factory charge.
Commissioning and walkthrough
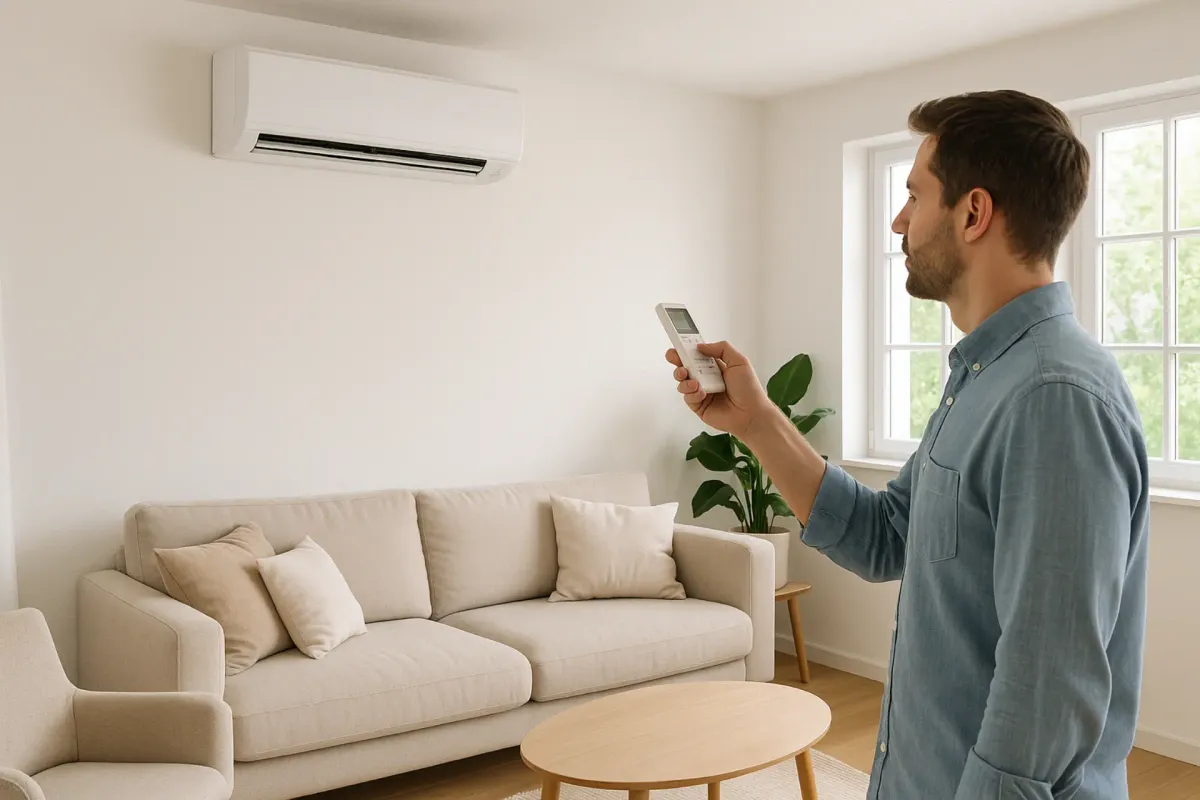
30 minPower on, verify heating and cooling modes, check airflow, set up Wi-Fi connection, and walk homeowner through remote control operation and filter maintenance.
Total installation time for a straightforward single-zone system is 4–6 hours. Add 1–2 hours for more complex installations involving long line runs, multi-story routing, or concrete wall penetrations. In virtually all cases, the installation is completed in a single day.
Cost Breakdown
Here is where your money goes on a typical single-zone 12K BTU wall-mount installation using a premium brand (Mitsubishi or Fujitsu) in the New England/mid-Atlantic market:
| Component | Cost Range | % of Total |
|---|---|---|
| Outdoor unit (condenser) | $1,200–$1,800 | 28% |
| Indoor unit (wall head) | $500–$900 | 15% |
| Refrigerant line set & fittings | $200–$400 | 7% |
| Electrical (circuit, disconnect, wire) | $300–$600 | 10% |
| Line-hide cover (optional) | $200–$500 | 7% |
| Mounting hardware & pad | $100–$200 | 3% |
| Labor (4–6 hours, 2-person crew) | $1,200–$2,000 | 30% |
| Total Installed | $3,700–$5,400 | 100% |
Cost Comparison: Mini-Split vs Window AC, Space Heater, and Baseboard
The upfront cost of a ductless mini-split is higher than plug-in alternatives, but the total cost of ownership tells a completely different story. When you factor in operating costs, replacement frequency, and comfort, a mini-split is typically the cheapest option over any period longer than 3–4 years.
| Solution | Upfront Cost | Annual Operating | Lifespan | 5-Year Total | 10-Year Total |
|---|---|---|---|---|---|
| Window AC + Space Heater | $300–$600 | $800–$1,200 | 3–5 yr | $4,450–$6,600 | $9,200–$13,800 |
| Portable AC + Space Heater | $400–$800 | $900–$1,400 | 3–5 yr | $5,100–$7,800 | $10,500–$16,200 |
| Baseboard Heat + Window AC | $0 (existing) | $1,000–$1,800 | Ongoing | $5,000–$9,000 | $10,000–$18,000 |
| Single-Zone Mini-Split | $3,500–$5,500 | $300–$500 | 15–20 yr | $5,000–$8,000 | $6,500–$10,500 |
Why the alternatives cost more long-term
- Electric resistance heating (space heaters, baseboard) converts 1 unit of electricity to 1 unit of heat. A heat pump delivers 2.5–4.0 units of heat per unit of electricity. That is a 60–75% reduction in heating cost.
- Window and portable ACs have SEER ratings of 8–12. Modern mini-splits are SEER2 19–23. That is roughly 50% less electricity for the same cooling output.
- Replacement cycle: Window ACs and space heaters last 3–5 years. A mini-split lasts 15–20 years. Over a decade, you buy 2–3 sets of plug-in equipment vs. zero replacements for the mini-split.
- Fire risk: Space heaters cause approximately 1,700 home fires per year in the US. A mini-split has zero combustion risk.
The break-even point where a mini-split becomes cheaper than plug-in alternatives is typically 3–4 yearswithout any rebates. With a state rebate of $800–$3,000, the break-even drops to 1–2 years. After that, every year is pure savings — $500 to $1,300 per year less than the alternative.
Schedule Your Single-Zone Install
Most installations completed in one day. Free site assessment and all-inclusive pricing.
Installation Requirements: What Your Room Needs
Before scheduling an installation, here is everything your room and home need for a successful single-zone mini-split install. Most homes meet these requirements without any modifications. Your installer will verify all of these during the free site assessment.
Electrical Requirements
9K–12K units: Dedicated 20A, 240V circuit
18K–24K units: Dedicated 30A, 240V circuit
Panel capacity: 20–30A available breaker space needed
Outdoor disconnect: Required by code within sight of condenser
Panel upgrade?: Only needed if panel is already at capacity (15–20% of homes). Cost: $1,500–$3,000 if needed.
Wall Penetration
Hole size: 3-inch (76mm) diameter through exterior wall
Purpose: Routes refrigerant lines, condensate drain, and communication cable
Sleeved and sealed: PVC sleeve with putty seal to prevent air/water infiltration
Wall types: Wood frame: 20 min. Brick/stone: 45 min. Concrete/block: 60 min.
Repair if removed: Can be patched and sealed if unit is ever removed. Minimal visible trace.
Outdoor Unit Placement
Clearance: 12–24 inches from wall on all sides for airflow
Foundation: Level concrete pad (ground mount) or wall brackets
Snow protection: Raised pad or stand to keep unit above snow line (min 18 in. in NE)
Avoid: Direct drip from gutters, areas where snow drifts pile, direct afternoon sun
Noise: 40–50 dB outdoors. Keep 5+ feet from bedroom windows, property lines.
Indoor Unit Placement
Mounting height: 7–8 feet from floor (wall-mount). Above furniture clearance.
Best wall: Exterior wall nearest condenser. Longest wall for best air distribution.
Avoid: Above doors, behind furniture, directly facing beds, near heat sources
Clearance: 6 inches above unit, 4 inches on each side for airflow and service
Remote access: Wi-Fi connected models need 2.4GHz signal in the room
Lineset Specifications
Maximum length: 50–100 feet depending on model (9K typically 65 ft max)
Maximum elevation: 30–50 feet vertical difference between indoor and outdoor units
Line hide: Optional PVC channel covers lineset on exterior wall ($200–$500)
Insulation: Both suction and liquid lines must be insulated to prevent condensation
Long runs: Runs over 25 feet may need additional refrigerant charge (included in install)
Permits and Inspections
Mechanical permit: Required in most municipalities. $75–$200 fee.
Electrical permit: Required if running new circuit. Often combined with mechanical.
Inspection: Post-install inspection by local building inspector (1–2 weeks)
HOA approval: Some HOAs require approval for outdoor equipment. Check first.
NuWatt handles this: We pull all permits, schedule inspections, and handle paperwork.
The most common complication is electrical panel capacity. If your panel is already full, adding a 20A or 30A circuit requires a panel upgrade or sub-panel installation. This adds $1,500–$3,000 to the project. Your installer will check this during the site assessment before quoting. In roughly 80% of homes, the existing panel has adequate capacity for a single-zone unit.
Monthly Running Costs
One of the biggest advantages of a ductless mini-split is its remarkably low operating cost. Because heat pumps move heat rather than generating it, they deliver 2.5–4.0 units of heating for every unit of electricity consumed. Here are estimated monthly electricity costs by unit size for the heating season in New England (assuming $0.28/kWh average electricity rate and moderate use of 8–12 hours/day):
| Unit Size | Heating (Winter) | Cooling (Summer) | Annual Estimate |
|---|---|---|---|
| 9K BTU | $30–$50/mo | $20–$35/mo | $250–$420 |
| 12K BTU | $40–$65/mo | $25–$45/mo | $330–$550 |
| 18K BTU | $55–$90/mo | $35–$60/mo | $450–$750 |
| 24K BTU | $70–$120/mo | $45–$80/mo | $580–$1,000 |
Compare this to the alternatives: electric baseboard heating the same space costs 2.5–3 times more. A window AC unit costs roughly the same for cooling but provides no heating. An oil-fired space heater costs more and adds combustion risk. The mini-split replaces all of these with a single, efficient, year-round unit.
Common Mistakes to Avoid
After thousands of single-zone installations across New England, these are the mistakes we see homeowners (and some contractors) make most often:
Oversizing the unit
Buying a 24K BTU unit for a 300 sq ft room because "bigger is better." Oversized units short-cycle, waste energy, create temperature swings, and fail sooner.
DIY refrigerant work
Refrigerant handling requires EPA 608 certification by law. DIY installations void manufacturer warranties and often result in leaks within 1–2 years.
Placing indoor unit above a door
Seems logical but creates terrible air distribution. The air blows straight across the room and back. Mount on the longest wall, centered or offset toward the area with the most heat loss.
Skipping the permit
Most municipalities require a mechanical and/or electrical permit. Unpermitted work can cause problems when selling your home and may void insurance coverage.
Choosing the cheapest quote
The $2,500 quote that seems too good to be true usually is. It often means no permit, no vacuum pump (just "cracking" the lines), undersized wire, and a warranty that is worthless.
Ignoring the outdoor unit location
Placing the condenser where snow drifts pile up, under a dripping gutter, or in direct afternoon sun. All of these reduce performance and lifespan. Proper placement matters.
Not checking state rebates
Even single-zone installations qualify for state rebates in most New England states. In Maine, that is $800 per unit. In RI, income-qualified rebates can exceed the installation cost.
Assuming the federal tax credit still exists
Section 25C expired December 31, 2025. There is no federal tax credit for residential heat pump purchases in 2026. Any contractor who quotes with a tax credit is either uninformed or dishonest.
Keeping It Running: Maintenance for a Single Unit
One of the most appealing aspects of a single-zone ductless system is how little maintenance it requires. There are no ducts to clean, no combustion chamber to inspect, and no fuel delivery to schedule. Here is the complete maintenance routine:
- Every 2–4 weeks — Clean or rinse the indoor unit's air filters. This takes 2 minutes: pop the front panel, slide out the filters, rinse under warm water, let dry, and reinstall. Dirty filters are the number one cause of reduced performance and higher energy bills.
- Every 6 months — Inspect the outdoor unit for debris, leaves, or snow accumulation. Clear at least 12 inches of space on all sides. Check that the condensate drain is not clogged.
- Annually — Schedule a professional maintenance visit ($100–$150). The technician will check refrigerant pressures, clean the outdoor coil, verify electrical connections, and test all operating modes.
- Every 3–5 years — Professional deep cleaning of the indoor unit's blower wheel and evaporator coil. This removes mold, dust, and biofilm buildup that filters cannot catch. Cost: $150–$250.
2026 Rebates and Incentives for Single-Zone Mini-Splits
The federal Section 25C heat pump tax credit expired December 31, 2025. There is no federal tax credit for residential heat pump purchases in 2026. Any contractor who includes a federal tax credit in their quote is either uninformed or misleading you. However, two significant incentive programs remain available:
State Rebates
Available to all homeowners
Maine
Efficiency Maine — income-tiered
$800–$3,000/unit
Rhode Island
Clean Heat RI — 60% of cost standard
Up to $11,500
Massachusetts
Mass Save — requires approved installer
$1,250/ton
Connecticut
Energize CT — tiered by program
$250–$1,000/ton
New Hampshire
NHSaves — limited to ENERGY STAR units
$450/unit
New Jersey
Whole Home — varies by utility
$500–$1,400
Federal Tax Credit: Expired
Section 25C provided up to $2,000 for heat pump installations through December 31, 2025. It was repealed by the OBBBA (signed July 4, 2025). There is no federal tax credit for residential heat pump purchases in 2026. Do not let any contractor tell you otherwise.
Is a Single Ductless Mini-Split Worth It?
For adding comfortable, efficient heating and cooling to a single room, a ductless mini-split is almost always the best answer. Here is how it compares to every alternative:
vs Duct Extension
40–50% cheaper
$3,500–$5,500 vs $5,000–$10,000
vs Baseboard + Window AC
50–70% less/yr
$300–$500/yr vs $1,000–$1,800/yr
vs Space Heater Risk
Zero fire risk
1,700 home fires/yr from space heaters
vs Portable AC
2x more efficient
SEER2 21–23 vs SEER 8–12
The technology is mature and proven — mini-splits have been the dominant heating and cooling solution in Asia and Europe for decades. In New England, cold-climate models from Mitsubishi, Fujitsu, and Gree deliver full heating capacity down to –15°F to –22°F, making them viable as a room's sole heat source even in the coldest winters.
With the federal tax credit gone in 2026, the out-of-pocket cost is higher than it was in 2024–2025. But state rebates remain strong (especially in RI, MA, and ME), and the energy savings generate a positive return within 3–6 years for most homeowners. Over 10 years, a mini-split saves $3,500–$7,500 compared to the plug-in alternatives it replaces.
If you have a room that is always too hot in summer, too cold in winter, or both — a single ductless mini-split is the fastest, most cost-effective path to year-round comfort. One day of installation. 15–20 years of quiet, efficient operation. No combustion, no ductwork, no hassle.
Get a Free One-Room Assessment
NuWatt evaluates your room, recommends the right size and type, and provides an all-inclusive quote — no obligation.
Frequently Asked Questions
What size mini-split do I need for one room?▼
How long does it take to install a single-zone mini-split?▼
Continue Reading
Mini-Split Cost 2026: $3,500–$14,000 by Zone Count
A single-zone mini-split costs $3,500–$5,500 installed. A 3-zone system runs $8,000–$14,000. Brand, zone count, and install complexity drive the final price. Here is what to expect in 2026.
Ducted vs Ductless Heat Pumps: Manual J-Based Comparison by Home Type
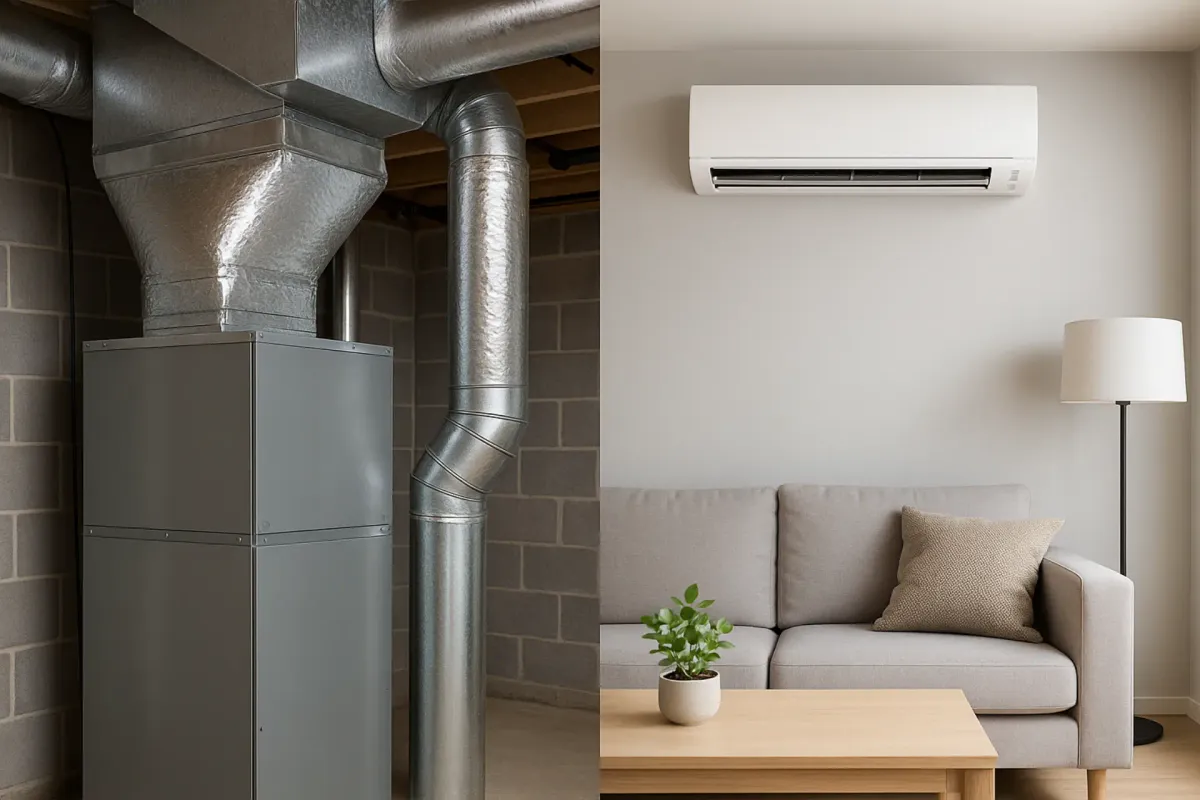
Ducted heat pumps use existing ductwork and provide whole-home coverage from a single unit. Ductless mini-splits need no ducts and offer room-by-room control. The right choice depends on your home's existing infrastructure and layout.
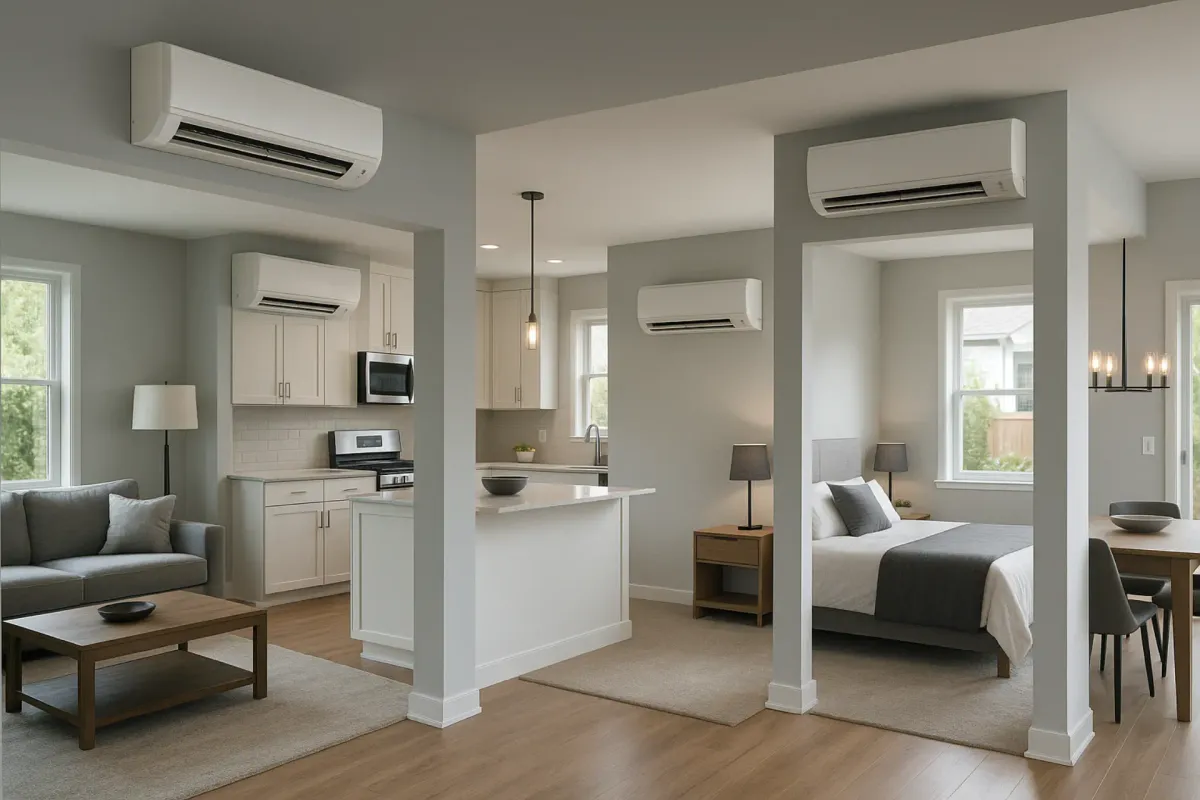
Room-by-Room Comfort: Multi-Zone Ductless Design Mistakes to Avoid
The #1 multi-zone mistake is connecting too few indoor heads to an oversized outdoor unit. This causes short-cycling, poor humidity control, and energy waste. Each indoor head should be matched to the room's actual heating load.